Miter Saw Fin Slots
 |
With the help of my father, Warner, I have discovered a much easier way. You do, however, need the right tools. This may be the hardest part because you must to a proper saw. I used a 12" sliding compound miter saw (model DW708) made by DeWalt. I would guess that it is possible to use a standard (non-sliding) miter saw but I would think that it would be much more difficult and more dangerous to your fingers. A sliding miter saw really makes the process much safer and easier. Clean fin slots are not worth sawed fingers. To make a clean cut, you also need the correct type of saw blade. The blade on this particular saw is a 12" diameter, 80-tooth carbide blade.
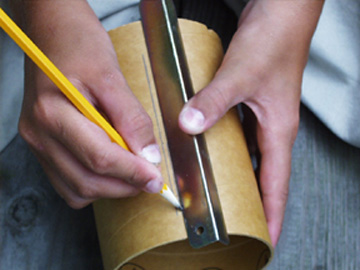
The tube must first be marked with the correct sloth length and width. Most of you probably already have a method to accomplish that. I typically use a small steel angle as shown. Here you can see a small section of 3.9" diameter tube that I had left over from my Aerobee 300 project. Measure and mark the tube accurately.

| Editor's note: The tube should be clamped into the saw, not held by hand during the cut. Never turn on a saw with your hand in the path of the blade. |
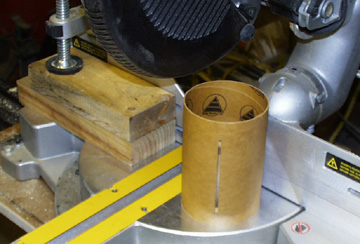
This is the setup for cutting. I have a couple of 2 x 4's clamped to the left of the piece as a positive stop. The tube will sit exactly square and centered on the saw. The blade slot underneath the tube centers the tube perfectly under the blade and since the tube is pushed against the rail, it is also perfectly square. After careful alignment, you can cut. The sliding saw allows you to start the slot in the middle and slowly cut from the center to the front and then to the rear of the marked slot. You may need to make more than one pass on the slot to ensure that it is wide enough for the fin material that you are using.
To finish the job, a sharp x-acto blade can be used to finish the ends. As you can see below, both the inside and the outside of the finished slot are flawless.


Submitted by: Chip Jenkins
