Router Fin Slots
 |
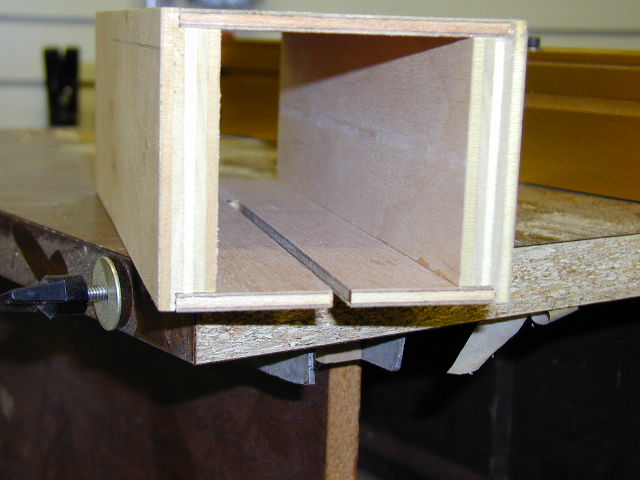
This jig is extremely easy to build and use. The idea is a variation of John Coker's jig but does not require the construction of a router base. You'll want one jig for each tube size you plan to slot. A larger model with shims for smaller tubes might work but it's just as easy to knock out the exact right size ones, so why not?
The jig is just a box with inside dimensions that match the outer diameter of your tubes. The one pictured here is measures 3 and 160/1000's (according to my dial caliper - that translates into appx 3 5/32" which is the diameter of a Public Enemy 3.1" airframe with 4 layers of fiberglass).
The box sides are 3/4" cabinet grade plywood with 1/2" wide by 1/4" deep rabbets on the long edges. I cut those with 2 passes on the tablesaw - you could also use a router. The sides are about 12" long - this contemplates a 7 3/4" slot and about 4" additional for rigidity. You can make them shorter or longer if you need different size slots but I've found that for tubes 36" long you only need 5 or 6" in addition to the slot length for good accurate grippage while cutting.
The bottom and top are 1/4" Luan, cut 1" wider than the airframe and simply glued into the rabbets. Clamp it up and square it by clamping the ends on the longer diagonal. The top and bottom should be flush in the rabbet.
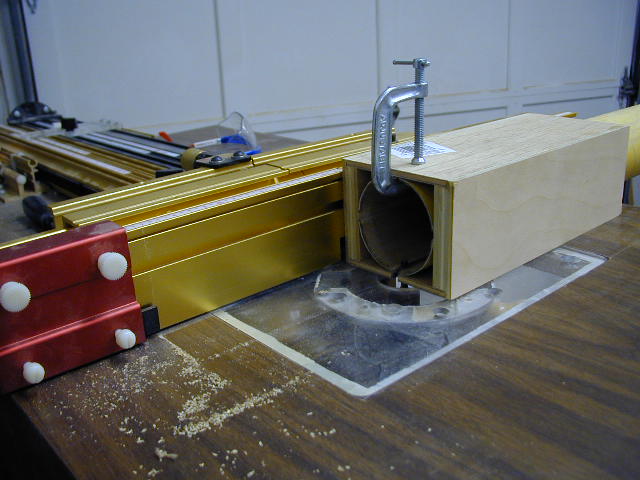
Initially, your airframe will be a tight fit - this is good. Center the jig against your fence and install a stop block on the outfeed end. Line up your mark for the 1st slot and away you go. The fit loosens a little as the slots are cut.Ā I used a 1/4" 2 flute carbide straight bit which gave good results, but an upcut spiral bit would probably work cleaner. If you don't want the slot to go all the way to the end of the tube, drill a pilot hole and start there.
 |
 |
Submitted by: Jerry OSullivan
