Anti-Zipper Design
 |
Have you ever had the dreaded Zipper Effect happen to you? The Zipper Effect can happen when parachute deployment occurs at a high rate of speed. If the rocket was designed using traditional methods, the shock cord can rip a good slice down the side of the body tube.
This has happened to many on several occasions due to early ejection, or ballistic trajectories. It appears that we have been building our rockets backwards all of these years!
The main problem is that by attaching the shock cord to the inside of the body tube (e.g. motor mount bulkhead, side wall) you have a design that will zipper on you. This is because when the parachute deploys, the rocket body will be forced to change direction and the only way that can be done is by the shock cord pressing on the side of the body tube. If the force is too high, then the body tube will be damaged. Some shock cord failures can also be attributed to the high shear stress caused by the cutting edge of the body tube during parachute deployment. This hypothesis has been verified using slow motion video.
Construction
 |
 |
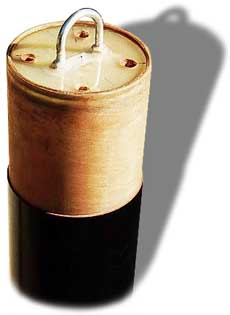
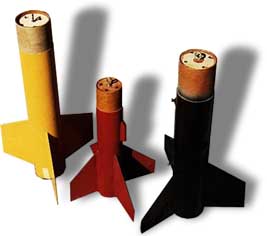
The solution is very easy. Your rocket needs to have an upper section that contains the parachute and shock cord (Figure 1). This is most easily done by using the payload section of your rocket. Instead of attaching the tube coupler to the payload section and then inserting into the lower body tube section, you attach the tube coupler to the lower section of the rocket. You will have to drill a few holes in the coupler bulkhead to allow the ejection pressure to pass through so that separation can occur (Figure 2).
You will need to attach a short piece of shock cord to the nose cone so that the upper part of the rocket can be attached to the parachute. A longer piece of shock cord is then used for the lower section.
Flight Prep
Prepping the rocket is simple; attach the parachute to the two shock cords (use quick links!), let the upper shock cord simply drop into the upper section, use rubber bands to help gather the lower shock cord, and fold the parachute. Insert the lower shock cord and the parachute at the same time, side by side, next to each other. Attach the lower shock cord to the coupler bulkhead on the bottom section of the rocket.
Ejection will cause the two pieces to separate. The drag on the lower section will pull out the parachute and shock cords. Both pieces of the rocket will continue in the direction they were going. As the parachute fills, the force will be transmitted through the shock cords. No change in direction will occur for the upper section so the upper shock cord will not tear at the side of that body tube. The lower section will need to change direction, but the lower shock cord is attached to the screw eye on the coupler bulkhead so that body tube is safe.
If you do not want to give up your payload section, you can add a body tube piece to hold the parachute. This tech-nique will work well if you want to retrofit an existing model (you will need to add the extra body tube piece and another bulkhead). This will, of course, lengthen your rocket. Another way is to cut the body tube so that the motor mount and fins are the bottom section and the upper section will contain the parachute.

Other Benefits
In addition to fixing the Zipper Effect this design moves the center of gravity forward and eliminates the need for wadding! With respect to the wadding issue, it is suggested that if the coupler is close to the ejection charge you may want to consider putting a simple baffle inside the coupler. It has been done both ways without any problems.
One final point, you should only use Tubular Nylon for "shock cord". Do NOT use elastic or bungee; both will fail under heat or high energy deployment. The use of Tubular Nylon combined with the AntiZipper design AND good parachutes (eg. RocketMan) will decrease problems associated with high energy deployment significantly.
Submitted by Stu Barrett