
Starting to Finish a Rocket, or How to avoid driving yourself crazy
First, make sure you have everything you need before you start:
- Particle Masks
- Sandpaper in varying grits
- Filling Material
- Cleaning Materials
- Masking Materials
- Jigging Materials
- A proper place to spray the part
- A proper place to dry the painted part
Getting the stuff all in one spot at one time can save a lot of repainting grief which is what this is all about. When the finish doesn’t go on properly it either looks like heck or needs to be redone which is a major pain.
Particle Masks
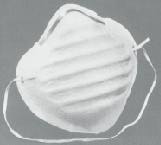
Need we say more? If you are concerned, use a respirator in lieu of a mask
Sandpaper
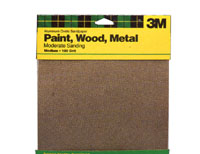
Sandpaper is fairly inexpensive if used economically. Tearing off a chunk of sandpaper as necessary does not always work and is wasteful. Here’s how you do it: Using a fresh sheet of paper, fold in half lengthwise and crease well. Cut along this crease using a metal straightedge, knife or scissors. You now have a sheet of paper that is 4 1/4” x 11”. Fold in half so the long ends meet, crease, open, fold the two long ends towards the middle so they meet and fold closed. You now have a sanding paper “book” with 4 sides of sanding grit. Open and fold the leaves of the book as the sandpaper is used. One sheet makes two books of four leaves each. Neat.
Normally, use 150 grit and 220 grit papers and stop there. Some people like to go into the finer grits but that’s not necessary. Maybe 320 maximum for a smooth finish of the primer coat or if you mess up and have to sand between coats of the finish. Hopefully, with fingers crossed the finish coat goes on in one application and its done in a dust free environment so no sanding is necessary. Well, it’s something to shoot for.
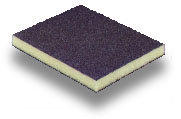
Sanding sponges are very cool as well. These come in a variety of grits from coarse to fine. They are a spongy material with an emery cloth bonded to one side. As the cloth becomes filled during the sanding process they can be washed and dried and reused numerous times so long as the grit remains.
As sandpaper is used the grit breaks down and becomes worthless. The grit, when seen under a microscope, has sharp edges which do all the sanding work. As the paper wears, these edges or facets becomes rounded and stop cutting. Effectively, the sandpaper becomes ball-bearing paper and it glides over the surface without doing its job. Change sandpaper often, it’s cheap.
Filling materials
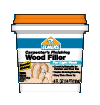
The best material that I have found is Elmer’s Finishing Wood Filler (or FwF) which comes in light and dark varieties. Either color works fine but at can consistency is rather heavy. Scoop some out and add a bit of water, stir and whip like crazy until the consistency is like creamy cake frosting. Buy a can of frosting at the supermarket to see what I’m talking about. This material then spreads like butter (or frosting for that matter) over cardboard, fiberglass, plywood, paper, almost any surface. It sticks incredibly well and sands like a dream. It can be applied with a brush, a spatula, fingers, almost anything. If it starts to harden up to soon and look clumpy mist it lightly with water and smooth. FwF fills spirals in a heartbeat. Available at hardware stores everywhere.
When using Finishing Wood Filler on fiberglass make sure the part has been sanded with a coarse grit sandpaper which allows the FwF to achieve a mechanical bond. The surface profile created by sanding is called “tooth” which means it provides little gaps, nooks and crannies for the material to “bite” into. Typically 80 grit would be used on fiberglass.
Some people also like Squadron Putty and Auto Body Lacquer (or spot) Putty. These shrink too much and require too many reapplications to achieve a desireable end result.
For epoxy or polyester filling materials, see the other Info Central sites regarding epoxy and laminating. The polyester stuff is often called “Bondo”, the epoxy fillers are admixtures which are stirred into the epoxy at mixing. These admixtures are most often fumed silica or cab-o-sil, microballoons, talc, wood flour, and milled or chopped fiberglass.
Cleaning Materials
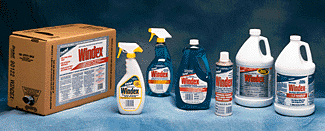
A supply of acetone, denatured alcohol, and mineral spirits along with a bottle of windex is very important. Quarts are the best sizes to purchase.
Rags are also important, old pure cotton white t-shirts are the best.
Tack rags are also essential. A tack rag is merely cheesecloth folded up numerous times which has been saturated with a tacky resin, hence “tack rag”. Very inexpensive. Use after the body tube, fins, or NC has been sanded prior to priming and after the primer has been sanded prior to finishing.
A duster brush is also handy as is a vacuum cleaner, especially when it comes time to prime or paint the rocket.
Acetone is good in that it evaporates quickly and thins a variety of materials. Denatured alcohol is a good solvent for epoxies and generally is fairly mild on paint finishes. Mineral spirits thin only oil base paints and primers. Windex is handy in that it is water base, dries fairly quickly, removes grease, and won’t harm most paint finishes.
Masking Materials
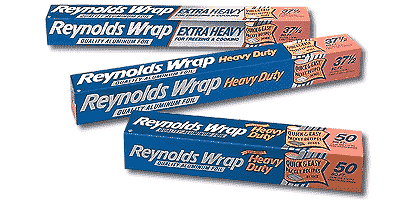
You need a supply of different masking materials; paper, tape, polyethelene shopping bags, aluminum foil.
Scotch brand Magic Tape is one of the better materials for masking fine details on a rocket. It’s inexpensive and very good at preventing paint from creeping underneath. Fold a little tab of tape sticky face to sticky face to facilatate removal of the tape after the painting is done, then peel sloooooowly to remove.
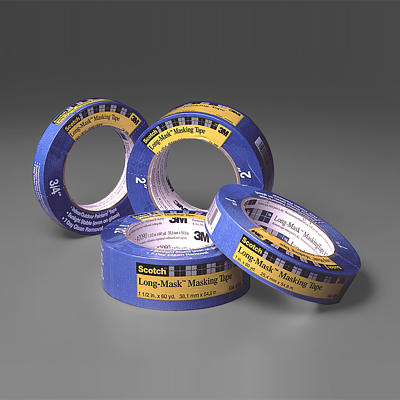
Masking tape is fine for larger masking efforts but be careful in that it can lift paper, primer or finish since it’s pretty tacky. A roll of Blue, or “long-life” masking tape works well for difficult surfaces. This type of tape often has a better adhesive that releases easier, seals better, and can be removed days later without the struggle.
You may also find a white “Safe Release” material but the adhesives in the product don’t stick well at all. The paper, polyethelene, and aluminum foil is for masking large surfaces. Aluminum foil is a very effective maskant as it conforms to the shape just by crumpling.
Jigging and Fixturing materials
Always have someplace to set the nosecone after it’s been painted. Ask any rocketeer how many nosecones they have dropped after painting and your answer will be a shake of the head and a short laugh.
Nose cones need two jigs, or painting fixtures. One for you to hold while the nosecone is getting painted and one to hold the finished nosecone for drying. A chunk of appropriate body tube works well for the initial fixture but can be tippy while the NC dries and often makes the NC difficult to rotate when painting. Plan ahead, tape a dowel to the chunk of body tube so the NC can be spun and make sure there is a 2x4 or similar base drilled to receive the dowel once the NC is complete.
Body tubes and fin cans need a similar fixture and drying jig. Typically the painting fixture is a dowel with an appropriate sized expended motor attached. The dowel and motor is inserted in the aft end of the rocket. Again, a 2x4 or similar base drilled to receive the dowel once the painting process is complete is necessary.
Painting parts prior to assembly is often done as well, a piece of corrugated cardboard with nails poked through allow a part to rest while drying. Suspending parts from coathangers also works well for painting and drying.
A Place to Paint
This can be anything but is often the most difficult part of the process. Some people hang out their windows, some use a refrigerator carton, some build a spray booth, some just go outside and have at it. Regardless, the area must be ventilated, relatively free from dust, and have little or no air movement. The coat closet would work but would lack ventilation, the bathroom with a fan would work but yikes, what a price to pay. A small spray booth or box with a fan blowing into the booth often is the best solution. You can simply use a large garbage can, spraying along the part so that the overspray goes down into the can.
Good lighting is absolutely essential. This might mean a handheld or standmounted lamp with a 150 watt bulb. Position the light source so that you can see the part you are painting at a slight angle to the light, this is called “sidelighting”. As you sight down the part the light shows up runs or misses or dry spots or orange peel. Often these can be corrected in subsequent prime or finish coats.
If you are spraying outside and the weather is cool make sure the paint is warm and the part is warm. Dunking your spray cans into a pail of warm water and shaking occasionally gets the most consistent spray pattern from a typical rattle-can. Watch out for flying water droplets as you shake the can in proximity of the part though. Spray cans are not perfect but one can get a pretty good finish if they are careful.
If the weather is cool, you may find that you need to bring the part in to warm up during the coating cycle. Here’s one way do it. Warm the can to room temperature, shake for at least 2 minutes then test can spray pattern on cardboard or paper. If the pattern isn’t right, shake some more, change tips, heat up the can in warm water, or toss the can and get a new one. The part to be painted is in a warm spot. Take the part and can outside and shoot one or two light coats of material. Return to the warm area and allow the paint to tack up a bit. Test for tackiness on the fixture holding the part or on some of the masking, don’t touch the surface! Once it has tacked up, apply another coat or two, remember to sidelight the part while painting.
Repeat this process for priming and painting.
A Place to Dry Out
This is most often a small room Using a little heater, warm the room up until it’s almost unbearable, then it’s just right for drying. Use jigs and fixtures to hold the part after finishing painting, and set the parts up and allow them to dry. Once the room is hot enough, a couple of hours of the heater running, the place will stay warm most of the night. Primers generally take 30 minutes or so to dry enough for sanding and finish coats are ready to be unmasked the next day.
Submitted by: Bob Fortune