
This will be an attempt to relate some of the techniques that work well when using plastic self adhesive film, commonly referred to as Monokote, to cover rocket components. This is how the author uses plastic films, and he does not insist this is the right way or the only way but this is what works for him.
What is Monokote?
Monokote is a term that has come to represent practically all plastic iron films much the same as the term Band-Aid is used when speaking of self adhesive bandage strips. There are many brands of iron on coverings in the marketplace today. Some are low temperature. Some are pre painted fabric. All are slightly different in their characteristics.
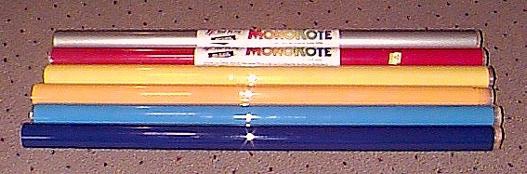
Top Flite Monokote in aluminum, red, yellow, cub yellow, sky blue and insignia blue. Just a few of the colors available.
The material we will discuss here is Top Flite Monokote. This has been around longer than most, has been widely available through almost all hobby shops and mail order outlets. It is very consistent in quality and is available in around fifty different colors which include opaques, transparents, metallics, and even some flat colors for those scale military projects.
Application
Plastic films can be applied to almost any size rocket. It is appropriate where weight is a concern as there are no primer or filler coats in most instances. It can be applied over fiberglassed tubes and fins but it really was developed to go over porous materials. The author has used it on body tubes from Estes BT20 to 6” mailing tubes with great success. Use heat carefully on small, thin body tubes as the film can shrink enough to crush the tube.
Note: Plastic films add about as much strength to your airframe as your final color coats of paint so if you are concerned about strength then another finishing procedure might be in order.
Paradigm Shift
One of the major changes that occurs when finishing with plastic films is the order of construction and finishing. Traditionally our rockets are built and sometimes flown before we even consider the finishing process With plastic films it is usually much easier to finish the rocket components individually and then assemble them.
Certain sub assemblies are constructed and installed in the traditional manner such as motor mounts, payload bays, and bulkhead assemblies, plus cutting fin slots and drilling holes but it is much easier, for example, to cover a body tube without the fins attached and then just cut away the film from the slots and holes. Likewise, it is easier to cover a fin when you can hold it in your hand rather than being attached to a six foot rocket.
Note: Adhesives need to be applied directly to the part. Trim away the film as necessary to ensure a good bond such as fin/body tube joint. When using through the wall fin attachment, remove the covering from the portion of the fin that is inside the body tube and apply the fillets inside before adding the aft centering ring.
Tools
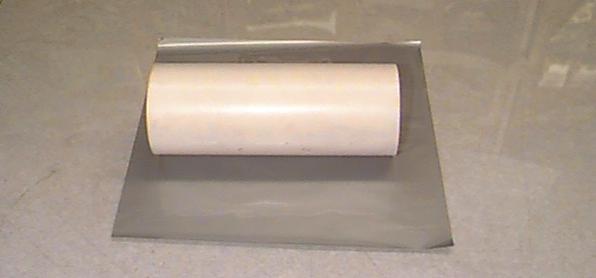
There are only a few tools you need to do a good job of covering with plastic films. If you are planning on doing a lot of covering with film, you should purchase of a heat sealing tool or iron although a small travel iron or even a standard household steam iron (don’t use the steam setting) will do. Along with this you will need a metal straight edge, a measuring device of some sort, and single edged razor blades or hobby knife with SHARP blades.
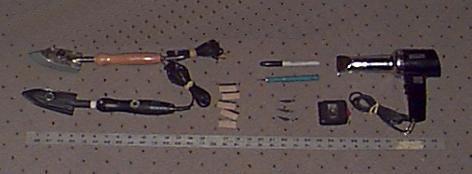
Only a few tools are required to do a professional looking job of covering with plastic films. The heat gun is not necessary but can make certain jobs easier.
There are many items that can be used to make this job easier such as heat guns for larger areas and trim tools to get that perfectly straight, almost invisible edge but really all that is needed is an iron and a way to cut the material. The plastic dulls blades very quickly and single edged razor blades are as good as no. 11 blades and a lot cheaper.
Surface preparation
This is the best part and probably the most important. When covering body tubes the less you prepare, the better off you are. The idea is to have a smooth dust free surface to which the covering may be applied. Monokote was designed to be applied over a smooth porous surface. Paper body tubes are both. The more you sand the more dust you have. Don’t sand the tube at all unless there are some imperfections that need filling or some rough spots that need smoothing out. Get out the shop vac and go over the tube inside and out to remove all of the dust. Then wipe it down with a soft, dry, lint free cloth. An automotive tack cloth would even be a good idea. One little speck of dust under your covering job ends up looking like you left your X-acto knife under there.
Fins, whether ply or balsa, get a little more attention. Shape and sand any wooden parts as you would when you are getting ready for your first coat of primer/sealer. Again the important part is getting rid of the dust. Vacuum and tack as necessary.
Applying the Film
First, read the instructions that come with each roll. There is a lot of information there that will be helpful with covering in general. The iron should be set so that it is hot enough to activate the adhesive but not hot enough to begin shrinking the material. Try a small piece of material on a scrap piece of wood first. Set the iron temperature so the film sticks to the wood but the material doesn’t shrink much. The larger the piece of film you are using the more critical the iron temperature is.
Note: Be sure to remove the backing sheet from the film before covering. Don’t laugh. It has been done.
Once the iron temperature is set we are ready to begin covering. Often a sock is slipped over the end of the iron to keep from scratching the film. If a sock is used the temperature of the iron must be set with it in place.
Fins and Other Wooden Things
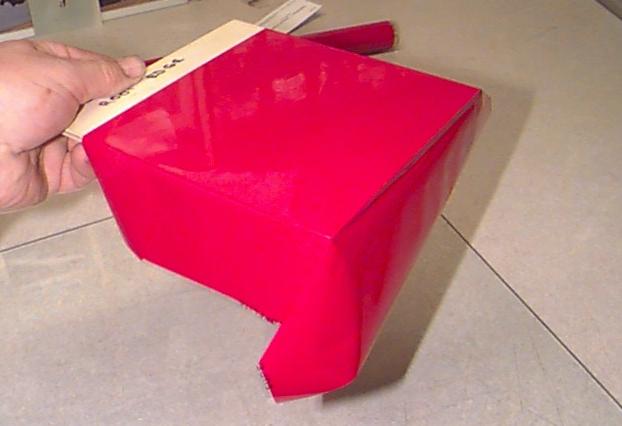
Start with a fin. Cut off a piece of covering large enough for the fin plus about an inch overhang on each side.
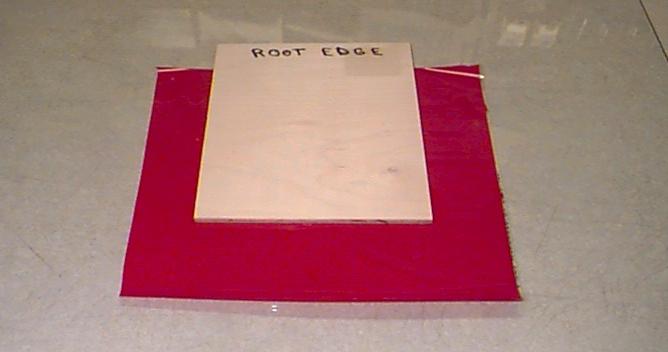
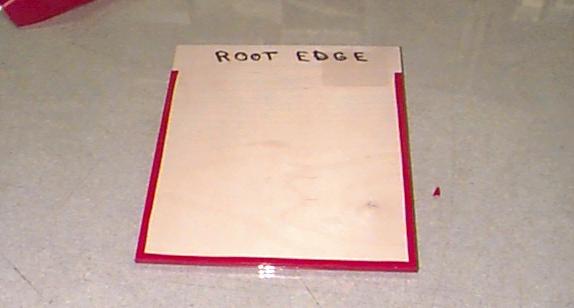
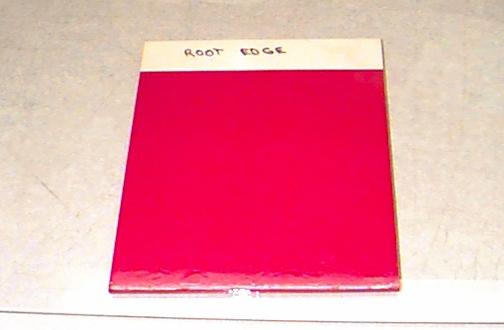
Notice the root edge and portion that goes through the body tube does not need covered.
On solid surfaces, which is almost everything we will be working with, begin in the center and start working toward the edges. As you move toward an edge, pull the film down over the edge to keep it from wrinkling and continue ironing down the film, allowing air to escape as you go.
Allow air to escape in front of the iron to eliminate air bubbles. Any bubbles that do appear can be pierced with a pin and ironed down.
Continue in each direction always working out from the center until the entire fin is covered. Any air bubbles can be eliminated by making a hole with a pin and reapplying heat. This next step is important. Turn the heat up slightly on the iron (You might want to mark your previous setting with a sharpie or piece of tape) and go around the edge of the fin with the iron pulling the film around the edges. The film will shrink, wrapping itself around the edge of the fin.
The film needs to wrap around the edges of the fin to keep air from getting under the seams during flight and separating the film from the fin.
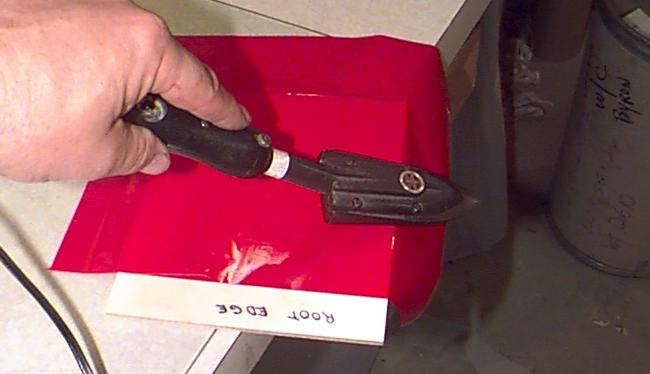
Trim the film with a 1/4” overhang on the leading, tip, and trailing edges. Trim the root edge flush with the edge of the fin. With the higher iron setting continue ironing the edge down until it is attached firmly to the other side of the fin.
Fin covered on one side and wrapped around and ironed down on the other.
It is OK to cut the film at the corners to keep it from bunching up. Repeat for the other side of the fin.
Completed fin. Three more to go.
Cover all your fins now and by the time you’re finished you should be ready to try the body tube(s).
Body Tubes
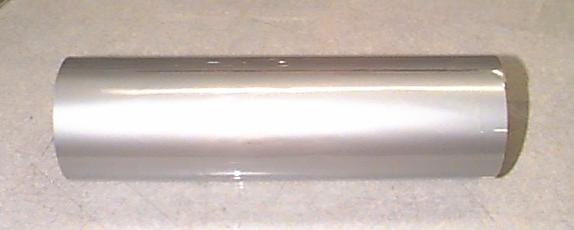
Body tubes are not difficult to cover but they are a little different. The author has covered body tubes 6” in diameter by 4’ long with one piece of film. Normally the color scheme you have picked for your model will allow you to use smaller pieces so start at the aft end and work forward overlapping the next piece by 1/4” to 1/2”. Placing the overlaps in this manner will lessen the chance of air being forced under a seam and loosening the covering. First, cut a piece of film large enough to wrap all the way around the tube and overlap at least 1”. The length should be sufficient to go past the end of the tube about 1/2” or so and about the same past the spot you want the next color to start.
Cut covering large enough to wrap completely around the tube and extend past each end. This is a 3” tube about 8” long. Start with a couple of practice pieces to gain experience.
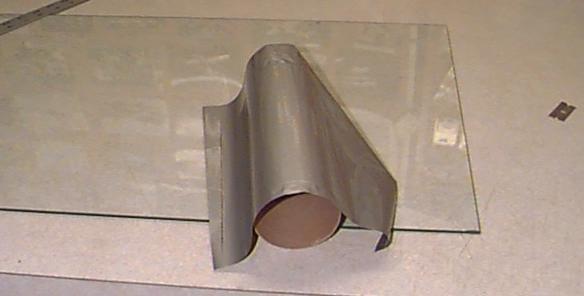
If you are covering a 4” tube or larger you may want to place it in some sort of holder to keep it from rolling around. A Robart Super Stand (purchased from a local hobby shop) works well, but even a cardboard box with cut outs on each end large enough to hold the tube will work. Begin with the film wrapped around the tube so that the overlap joint is parallel with the center line of the tube.
Film wrapped loosely around tube. Note that seam is parallel with center line of tube.
Don’t worry if the overlap is too big. There will be time to trim it to the size you want later. Begin attaching the film by ironing it down starting in the center and working toward each end.
Begin attaching film opposite the seam and work both directions until tube is completely covered.
Once the body tube is covered, trim to within about 1/4” to 1/2” from each end and apply higher heat around ends to cause the film to shrink around the ends.
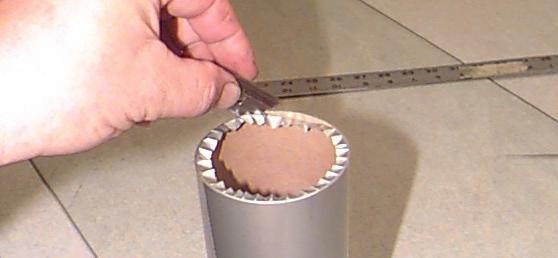
Apply extra heat to film extending past tube end. Trim to the inside of the tube and reseal edge.
Nose Cones
Wooden nose cones and transitions can also be covered with plastic films but these require a great deal of patience and are best done by using two or even three pieces of film. A heat gun is also a great asset in covering complex shapes such as these. The author paints most of his nose cones.
Stripes and Stuff
A rocket that has been covered with plastic film is the perfect base for Monokote Trim Sheet. This is the pressure sensitive vinyl that almost everyone uses anyway. It was developed to put over Monokote. Add stripes and rings and lettering as you like. Wet large areas with a water/dish washing liquid solution to make application easier and bubble and wrinkle free.
Final Thoughts
Everyone will eventually end up with their own best way of finishing their rockets if they don’t have one already. Monokote is a quick and easy way to finish rockets. It is without the chemical hazards involved with painting. It is a relatively inexpensive finishing method if you consider the materials and equipment needed to do a first rate paint job. It is not for every project but it can give the beginner an opportunity to have a great looking finish. If you make a mistake just apply some heat and remove the offending piece and start over.
Some will say that plastic films are only OK on small to mid powered rockets. Here is a photo of a 6” diameter upscaled Pathfinder. It is 13’ 4” tall and weighs a mere 10 pounds. The nose cone is painted. The rest is finished in white, orange, and aluminum Monokote, including the custom made transition, with red and black Trim Monokote. This flight is on an Aerotech J350 White Lightning Reload.
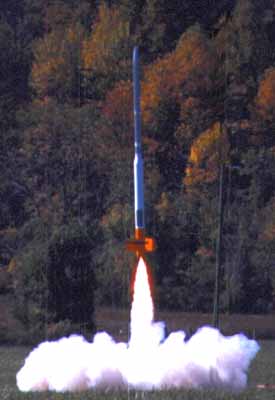
13’ 4” Pathfinder on an Aerotech J350. All Monokote but the nose cone!
Submitted by: Joe Grubb