Parachute Deployment Bags
 |
 |
| Photo 1 |
- Protect the parachute from the ejection charge. Bags are usually made of Nomex cloth.
- Allows the bridle and suspension lines to be pulled tight before the parachute
opens, preventing a large "jerk" on the system when the parachute inflates.
- Allows the parachute to move away from the rocket before it opens, helping prevent it from becoming tangled with the bridle, nose cone, fins, etc.
Deployment bags can be used with single-stage and two-stage recovery systems, though they are more commonly seen with two-stage recovery.
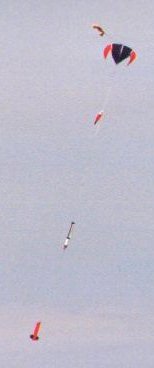
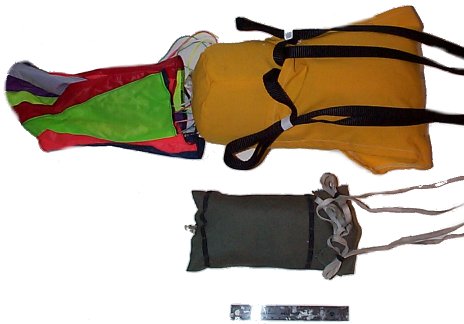
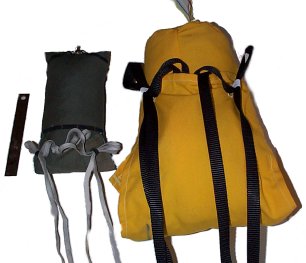
The descending rocket shown in photo 1 is using a Rocketman R7 parachute. The yellow deployment bag can be seen floating above the parachute. The bag is attached to the apex of the parachute.
Most deployment bags used in model rocketry are "deployment sleeves" rather than much more complex bags. A description of different type of deployment bags can be found in Theo W. Knacke's book "Parachute Recovery Systems Design Manual" (Para Publishing). Knacke's description of a deployment sleeve is below.
The deployment sleeve is a long cylindrical container that fits loosely over the parachute canopy. Frequently the sleeve ends in a flap that folds over the lower part of the sleeve and is closed with suspension-line stow loops.
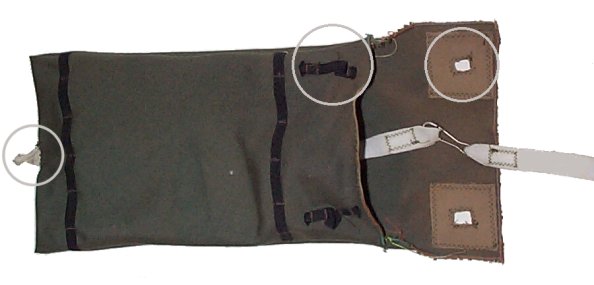
Pilot Chute and Suspension Line Stow Loops
 |
| Photo 2 |
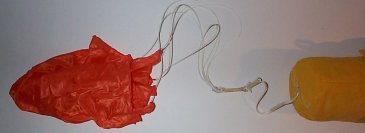
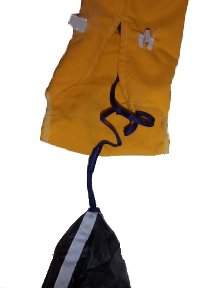
Some deployment bags use a pilot chute to pull the bag off the main parachute, as shown in photo 2 which has an 18" pilot chute. Before the bag can be pulled off the parachute the bridle and suspension lines are pulled tight and away from the faster descending rocket. When the lines are tight the bag is pulled off the main parachute. Some deployment bags are designed to open and pull off the parachute without a pilot chute.
Rocketman deployment bags do not use a pilot chute. The author has modified
Rocketman medium and large bags to use a pilot chute. Photo 2 shows an 18" pilot
attached to a Rocketman medium bag. A short 1/4" tubular nylon bridle was added
to the bag for pilot chute attachment.
 |
| Photo 3 |
 |
| Photo 4 |
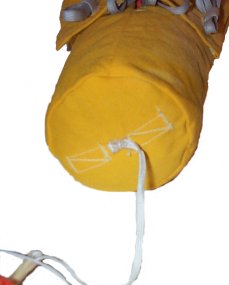
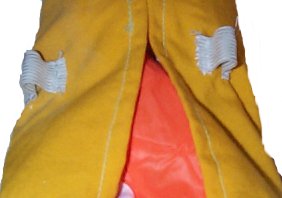
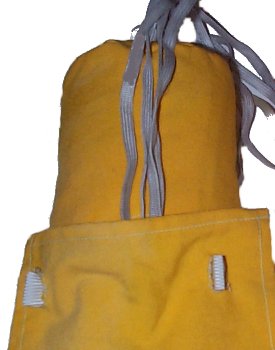
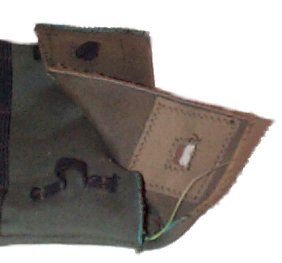
Two elastic loops can be seen on the bag. The flap has holes that match the loops. Final prepping of the bag for flight involved folding the flap over the bag, pulling the elastic loops through the holes, and then inserting the suspension lines through the elastic loops to hold the flap closed to protect the parachute and to prevent it from exiting the bag before the bridle and suspension lines are pulled tight.
The holes in the flap have been reinforced by sewing around them with carpet thread.
 |
| Photo 5 |
 |
| Photo 6 |
 |
| Photo 7 |
 |
| Photo 8 |
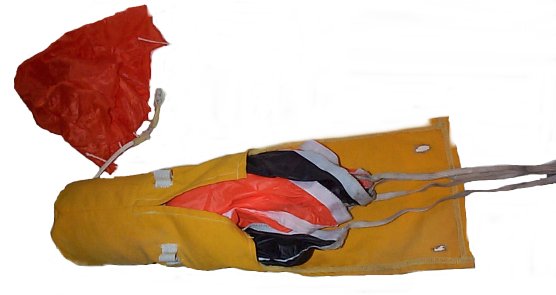
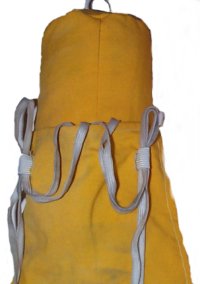
Photo 8 shows the suspension lines inserted through the elastic loops. The lines must go through the loops in a particular direction so that when pulled tight they easily pull out of the loops. If inserted in the wrong direction the lines may bind and not pull out of the loops.
The elastic loops only need to hold the suspension lines tightly enough that they
don't fall out. The suspension lines should slide out when gently pulled. If
the loops grab the suspension lines too tightly the pilot chute may not be able
to pull the lines out of the loops.
 |
| Photo 9 |
 |
| Photo 10 |
 |
| Photo 11 |
 |
| Photo 12 |
 |
| Photo 13 |
 |
| Photo 14 |
Although deployment bags are usually made of Nomex cloth, a Nomex heat shield should
be used between the ejection charge and deployment bag as additional insurance
against a melted parachute.
Matching Deployment Bag and Parachute
The bag must be large enough so the whole parachute can be stuffed into it. A bag can be larger (wider and/or longer) than needed, but a bag must be slim enough to easily slide in an airframe.
A deployment bag should fit into an airframe without jamming or binding when stuffed with a parachute. If the bag is too wide use a narrower and longer bag or it may jam during deployment.
No magic formula exists to match a bag and parachute unless both are purchased from the same manufacturer. The same size parachute from two manufacturers may need different bag sizes because different parachute manufacturers use different materials. One parachute may need a larger bag because it is made from a heavier and bulkier material.
Building a Deployment Bag
A simple bag can easily be constructed. This bag does not form a perfect cylinder because the bottom is not round. But it is simpler to construct than a bag that forms a cylinder.
Materials
- Nomex cloth.
- 1/4" tubular nylon or similar material for the bridles.
- Elastic.
- Someone with cutting and sewing facilities.
Determine the maximum diameter for the bag. If the bag will be used with a 4" diameter airframe the bag should have a maximum diameter of about 3.5". A diameter of 3.5" translates into a circumference of about 11".
3.14 * 3.5" diameter = 11"
Each side of the bag should have a seam of at least 1/8" wide. Therefore each side of the bag needs to be 1/8" wider making the unsewn material 5.75" wide.
The bag's length depends upon the size of the parachute when compressed, which depends upon the parachute's size and material. Compress the parachute to the desired diameter and measure the needed length. A simple way to do that is to stuff the parachute into a cardboard tube of the desired diameter and then measure the length. For example, stuff a parachute into a 3" diameter tube to estimate the bag length for a 4" diameter airframe. Because the deployment bag will not be a perfect cylinder the measured length will be the approximate length. You should add a couple of inches to the bag's length. A bag that is a little long is much better than one that's too short. A bag that is too short is worthless.
Add 3"-4" to the length for the flap.
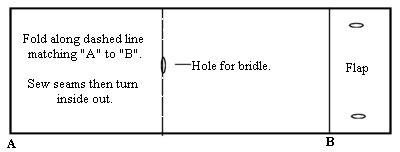 Put a small slot in the bottom of the bag and slide through the material for
the bridle and sew the bridle into place.
Put a small slot in the bottom of the bag and slide through the material for
the bridle and sew the bridle into place.
Sew the bag and turn inside out so that the seams are on the inside. Add the elastic loops. Cut holes in the flap to match the placement of the elastic loops, and sew around the holes to reinforce them.
The method you will use to attach the bag to the parachute depends upon your parachute's construction. For a Rocketman parachute melt two holes through the suspension lines at the apex and run the bridle to the deployment bag through the holes. Some parachutes have a spill hole with lines running over the hole. For those attach the bag's bridle to the lines over the spill hole.
Submitted by Dean A. Roth
